Wednesday, December 30, 2009

coco mint cookies


So I have not tried this recepie yet, but I have tasted them. The recepie is from Urban Cookies in Phoenix....some friends of ours who have the cutest place across the street from Xavier HS. Anyhow, I just live for these cookies and dream about them. I asked for them for Christmas even. Just the other day I was thinking I should beg them to give me the recepie, but surely they wouldnt. To my surprise I went on AZ Central's website and they had local cookie recepies noted. Yippee!

I just hope mine turn out as lovely and delicious as theirs! Thanks for sharing Urban Cookies!


1 1/2 sticks butter, room temperature

1 cup brown sugar

1/2 cup granulated sugar

1/2 teaspoon salt

1 1/2 teaspoons peppermint oil or extract

1 egg

2 egg whites

3/4 cup cocoa powder

1/4 cup milk

1 1/4 cups all-purpose flour

3 teaspoons baking powder

For coating: Granulated sugar and Powdered sugar

Preheat oven to 350 degrees.


In a large mixing bowl with hand beater or a mixer, cream butter, brown sugar, granulated sugar, salt and peppermint extract on medium-high speed until everything is well-blended. Add egg and egg whites to bowl. Mix on medium speed until eggs are fully mixed into the sugar mixture.


Warm milk in microwave for 30 seconds. Add cocoa powder to the bowl on low speed. Mix until fully incorporated. Stream the milk into the mixture on low speed. Stop and scrape the bowl.

Add the flour and baking powder to the bowl on low speed. Once incorporated, increase speed to medium for 30 seconds.


Refrigerate dough for 2 hours or until stiff. Using an ice-cream scoop, make evenly sized portions of dough, or roll dough into balls, about 3 ounces each, using hands. Roll each dough ball in the granulated sugar until completely covered. Next, roll the dough ball in powdered sugar. Make sure it is completely coated with no brown showing. Place on cookie sheet with a non-stick surface or covered with parchment paper. Bake about 25 minutes, or until done. For crispier cookie, bake longer.

Makes 1 dozen.

Tuesday, December 1, 2009

The Best Holiday Cranberry Relish

My name is Jessica and I have an addiction to cranberries. Sweet, sour, and so much vitamin C!


I found this New England Cranberry Relish recipe in the Chicago Tribune at least a decade ago.


Wonderful Fact Number One: You don't have to cook anything.

Wonderful Fact Number Two: This recipe can be made up to 3 weeks ahead! If you can keep from eating it for 3 weeks. Ideally, it's supposed to be made at least 4 days in advance. But we had it on Thanksgiving and don't tell anyone, but I only made it 3 days in advance. Actually, I didn't make it, my 12 year old did. Even better.
Wonderful Fact Number Three: My dear friend, Rose makes this every year and calls me on that day.

Terrible Fact: Cranberries aren't even sold in Chicago before October, which is too bad because soon I will post Aunt Deb's Amazing Cranberry Salsa that will knock your socks off. But you can't make it in September.

New England Cranberry Relish

Prep time: 15 minutes
Yield: 20-24 servings, 4 cups

Serve the relish with poultry, game, pork, ham and lamb. Mix with mayonnaise for a flavorful sandwich spread.

1 bag (12oz) cranberries
1 red apple, cored, cut into 1-inch wedges (We used a granny smith. Shh.)
3 tablespoons sugar
1/2 cup maple syrup NOT PANCAKE SYRUP.
3/4 teaspoon cinnamon
1/4 teaspoon ground cloves
1/2 cup pecans

Put cranberries, apple, sugar, syrup, cinnamon, and cloves in food processor fitted with metal blade. Pulse processor on/off to chop ingredients, stopping every few pulses to avoid over-chopping. The texture should not be too fine. Scatter pecans over mixture; pulse until coarsely chopped. Make at least 4 days ahead. Can be kept up to 2-3 weeks, refrigerated.

Saturday, November 21, 2009

Mushroom Stuffed Pork Chops with Polenta

I am actually posting something again! Emily, aren't you impressed? This is a sure sign that my play is over and my semester is coming to a close. Don't count on another one for quite sometime though because I will be moving soon and the holidays will hit us pretty fast here. Zach actually picked out this recipe because he loves to grill meat. They turned out really great, but I want to see if it would be good just doing it in the oven instead of on the grill (that way I won't need Zach's help... I really should learn how to use it I guess). Next time I may experiment with that. If anyone else decides to try them in the oven, let us all know how it goes.


Mushroom Stuffed Pork Chops
Prep: 25 Minutes, Grill: 35 Minutes
Makes 4 Servings (we made it into 6)

1/2 cup coarsely chopped fresh mushrooms (button, chanterelle, or shiitake... we used portabello)
1/4 cup chopped onion
1 tablespoon butter or margarine
1 teaspoon grated fresh ginger
1/4 teaspoon salt
1/4 teaspoon black pepper
1 cup coarsely chopped fresh spinach
1/4 cup soft bread crumbs
4 pork loin chops or pork rib chops, cut 1 1/4 inches think (we got them cut by the butcher)
1/4 cup ginger jelly or preserves or orange marmalade (we left this out, but it probably keeps it more tender)

1. For stuffing, in a small saucepan cook mushrooms and onion in hot better until onion is tender. Remove saucepan from heat; stir in ginger, salt, and pepper. Add spinach and bread crumbs, tossing gently until combined.
2. Trim fat from chops. Make a pocket in each chop by cutting horizontally from the fat side almost to the bone. Spoon one-forth of the stuffing into each pocket. Secure openings with wooden toothpicks. Sprinkle chops with additional salt and pepper.
3. For charcoal grill, arrange medium-hot coals around a drip pan. Test for medium heat above pan. Place chops on grill rack over pan. Cover; grill fro 35 to 40 minutes or until chops are slightly pink in center and juices run clear (160 degrees F) turning once, brushing occasionally with ginger jelly during the last 5 minutes of grilling (For gas grill, preheat. Reduce heat to medium. Adjust for indirect cooking. Grill as above)

*Compliments of Better Homes and Gardens New Grilling Cookbook


Polenta With Parmesan Cheese

Ingredients
  • 4 cups water
  • 1 cup quick-cooking polenta
  • 2 Tbs unsalted butter
  • 1/2 cup freshly grated Parmesan cheese
  • 1/2 tsp salt
Directions
  1. Bring the water to a boil.
  2. Slowly whisk in the polenta.
  3. Add the salt and cook, stirring frequently for 5 minutes.
  4. Stir in the Parmesan cheese and butter. Mix well.
  5. Serve immediately.
Note: These directions did not say to turn down the heat, but I did anyway after I whisked in the Polenta. Even with the heat on Medium the Polenta started spitting out of the pot at me. I took it off the heat completely and then just put it back on simmer and it turned out fine. Also, one cup of Polenta should be 4 servings.

Thursday, November 19, 2009

Giardiniera


This is one of those tasty treats you can get in Chicago, but it's hard to find elsewhere. A few years ago I found a recipe in the paper and we've made it a few times - the homemade version is even better than the jars you can get at the store. It is great on sandwiches or nachos.


Preparation time: 1 hour
Chilling time: 2 1/2 days
Yield: 3 cups

6 jalapenos, thinly sliced (I usually only do 3 so it's not too spicy)
2 each, diced: green and red bell peppers
1 each, diced: celery rib, carrot, yellow onion
1/2 head cauliflower, cut into florets
1/2 cup salt
3 cloves garlic, minced
1/2 cup chopped stuffed green olives (I usually omit)
2 1/2 teaspoons dried oregano
1/2 to 1 teaspoon red pepper flakes
1/2 teaspoon celery seeds
Freshly ground black pepper
1 cup each: apple cider vinegar, extra-virgin olive oil

1. Combine the jalapenos, bell peppers, celery, carrot, onion and cauliflower florets in a large bowl; stir in the salt. Add cold water to cover vegetables; cover bowl. Refrigerate 12 hours. Drain salt water; rinse vegetables. Set aside in the bowl.
2. Combine the garlic, olives, oregano, red pepper flakes, celery seeds and black pepper to taste in a medium bowl; set aside.
3. Pour the vinegar into a medium bowl; whisk in the seasonings. Whisk in the olive oil. Pour over the vegetable mixture; toss lightly. Cover;refrigerate at least 48 hours before using. The giardiniera will keep in the refrigerator for several weeks.

Saturday, November 14, 2009

Crunchy Parmesan Chicken Fingers


This is a 2 step process.
Step 1 - find a wonderful 11 year old girl who loves to help make dinner.
Step 2 - take pictures of her while she makes this recipe:

Ingredients

* 4 tablespoons plus 1/2 cup extra-virgin olive oil
* 1 cup buttermilk
* 1 1/2 pounds chicken tenders (about 18)
* 3 large garlic cloves, minced
* 1/2 teaspoon salt
* 3 tablespoons balsamic vinegar
* Freshly ground black pepper
* 1 1/4 cups freshly grated Parmesan
* 3/4 cup Italian-style seasoned bread crumbs

Directions

Preheat the oven to 500 degrees F.

Brush 1 tablespoon of oil over each of 2 heavy large lined baking sheets. Place the buttermilk in a large bowl. Add the chicken tenders and stir to coat. Let stand at least 15 minutes and up to 30 minutes.

Meanwhile, mash the garlic with the salt in a medium bowl. Whisk in the vinegar and then the remaining 1/2 cup of oil. Season the vinaigrette, to taste, with pepper. Transfer the vinaigrette to a small serving bowl.

Stir the Parmesan and bread crumbs in a pie dish. Remove the chicken tenders from the buttermilk and dredge them in the bread crumb mixture to coat completely, pressing to adhere. Arrange the coated chicken tenders on the prepared baking sheets, spacing evenly. Drizzle the remaining 2 tablespoons of oil over the chicken tenders and bake until they are cooked through and golden brown, about 12 minutes.

Transfer the chicken tenders to a platter and serve the vinaigrette alongside for dipping.

Thursday, November 12, 2009

afternoon snack (or lunch)


good bread (this was a loaf of french bread), cream cheese, avocado and tomatoes.  sprinkle generously with salt and pepper.  enjoy.

Tuesday, November 10, 2009

tomato soup and grilled cheese

i used the following recipe to make tomato soup the other night at jack's request.  i altered it based on ingredients i already had, so as to avoid a trip to the store and i think it still turned out delicious (i actually prefer basil to thyme, so i might have made that substitution anyway).  the kids all loved it and especially loved dipping their grilled cheese in it.


Ingredients:

  • 3 lb. plum tomatoes, cored and halved (i used canned tomatoes and was able to completely skip roasting them, although i am sure that is the tastier way to go...  i was going for quick and convenient).  
  • 8 fresh thyme sprigs  (i used chopped basil instead)
  • 4 garlic cloves
  • Salt and freshly ground pepper, to taste
  • 5 Tbs. olive oil
  • 1⁄2 cup mascarpone cheese (optional)
  • 1⁄2 cup grated Parmigiano-Reggiano
      cheese (optional)
  • 1 yellow onion, chopped
  • 3 cups chicken stock
  • 4 slices country-style bread, toasted (we made grilled cheese instead of toast)

Directions:

Preheat an oven to 275°F.

Arrange the tomato halves, cut sides up, on a baking sheet. Scatter the thyme sprigs and garlic on top of the tomatoes. Season with salt and pepper and drizzle with 3 Tbs. of the olive oil. Roast until the tomatoes have dried slightly and some of the skins have burst, about 2 hours.

Meanwhile, in a small bowl, using a rubber spatula, stir together the mascarpone and Parmigiano-Reggiano cheeses until smooth. Cover and refrigerate until ready to use.

Pass the roasted tomatoes through a tomato press according to the manufacturers instructions. In a large saucepan over medium heat, warm the remaining 2 Tbs. oil. Add the onion and sauté, stirring occasionally, until tender and translucent, 4 to 6 minutes. Add the pureed tomatoes, stock and bread and simmer for 5 minutes.

Using a stick blender or blender, puree the soup and season with salt and pepper. Divide the soup among 6 warmed soup bowls and top each with a dollop of the cheese mixture.
Serves 6.
sorry to be kind of a cheater by not following the recipe and make it more confusing by still posting it.  i figured there might be people who likes to follow recipes more exactly.  otherwise, just make any tomato soup recipe you love.  

Monday, November 9, 2009

mini cheese burgers

that's it.  we just found these teeny little buns (they were about 2 inches) and made teeny little burgers to go with them.  the kids loved the novelty of it and that was that.  i understand this is not exactly a recipe, but more of just a suggestion and i am fine with that.


as a side, i realize i have been a bit of a slacker on this website (don't get me started on how lame i have been with that online cooking group i joined...).  and, as a result, it seems to have caused some serious family distress.  thus, i am dedicating all my blogging this week (both here and on burch jerks as well as on my 23 other blogs) to my brother-in-law brian.  i hope it will ease some of the pain...

Sunday, November 1, 2009

Grilled Salmon Sandwiches


I made these tonight and everyone except George loved them. (Weird because he is the one who eats pretty much anything!) Raph had seconds......that is REALLY saying something. We had corn on the cob and sauteed mustard greens with it. And of course, Halloween candy for dessert!


For salmon:

Good olive oil

2 lbs. salmon fillets, skin-on

salt and pepper


for the sauce:

1 C. mayonnaise

1/4 C. sour cream

3/4 tsp. white wine vinegar

basil leaves

3/4 C. chopped fresh dill

1 1/2 Tbl. chopped scallions, green and white parts

1/4 tsp. salt

1/4 tsp. pepper

3 tsp. capers, drained


For Assembly:

6 brioche or other rolls

basil leaves or salad mix


For the salmon, Ina Garten says to grill. I put olive oil on a non-stick grill pan, sprinkled the fish with salt and pepper, and cooked it on medium-high heat, flipping when it looked about cooked half-way through.


For the sauce, put the mayo, sour cream, vinegar, basil, dill,scallions, salt, and pepper in food processor and process until combined. Add capers and process a couple more times.


To assemble the sandwiches, slice the rolls in half and spread a little butter on them. Put them face down in the hot skillet the fish was in and toast them. Spread a little of the sauce on the toasted rolls, add some of the basil or salad greens, and a piece of salmon, then top of roll.

Friday, October 16, 2009

Chocolate Pretzel Kisses

I discovered this recipe in the White Family Fare Volume II, published by Isabel, but the recipe is from Aunt Deb. I must make these every October, even though I can't find Hershey Hugs, Halloween M&Ms, and pretzel rings sold at the same stores. Target is the only place I can find Hugs, Jewel Osco for the pretzels. Now, there is no Jewel in most parts of the country and my mother and sister claim that they have had much success with mini pretzels, or snaps would work too, I suppose.
Ingredients:
50 pretzel rings (who counts these? I just make 'em til the Hugs are gone.
1 package milk chocolate kisses, or hugs, or the candy corn kisses you see in the pic.
1/4 cup M&Ms plain chocolate candies (but again, whose counting? There's no such thing as too many M&Ms in the house.)

1. Have your little ones wash their hands.
2. Preheat the oven to 275F.
3. Have the little ones unwrap all of the kisses or hugs, and no sampling til we are finished!
4. Put aluminum foil (or parchment paper) over a cookie sheet.
5. Place ring shaped pretzels in rows (or not) covering the cookie sheet. Place an unwrapped chocolate kiss (or hug) in the center of each ring.
6. Bake at 275F for 2-3 minutes, no longer. Remove from oven.
7. Immediately, smush one m&m onto each kiss, pressing lightly until the chocolate fills the pretzel. I like to put my m&ms "m" side down. I can be ocd sometimes.
8. Refrigerate for 5-10 minutes. At this point, we count the remaining m&ms and practice division among me and my 4 chocolate addicts. Nothing goes to waste around here.
9. Eat or store at room temperature.

Isabel uses mint kisses for Christmas, and they do sell the red and green M&Ms too. You could adapt this recipe for every major holiday!

Tuesday, October 13, 2009

Glorified Zucchini Casserole


A few months ago, Julie told me about Pioneer Woman. If you don't know Pioneer Woman, wait til you have a weekend to kill and check out her awesomest blog complete with true love story.
Pioneer Woman has a few pages: Confessions, Cooking, Photography, Home & Garden, Homeschooling and Tasty Kitchen. Tasty Kitchen is actually it's own site, with members posting recipes all the time. The recipes are rated, reviewed and easy to search. Tasty Kitchen is where I found this gem.
I am now a firm believer that the only good tasting vegetables are those that have been roasted in heavy cream. I could even become a vegetarian. My kids, who never before consumed zucchini in any form other than bread, ate multiple helpings. I am making this for Major Paul tonight.

Glorified Zuchinni Casserole
Added by jlclawson on August 25, 2009 in Sides, Vegetables

Prep Time 15 Minutes
Cook Time 45 Minutes Servings 8 Difficulty Easy

Ingredients
2 cloves Garlic Chopped
1 whole Sweet Onion, Chopped
1 whole Zuchinni Sliced In 1/4 Inch Sliced
1 whole Crooknecked Squash Sliced
4 whole Medium Red Potatoes Sliced
4 whole Tomatoes (home Grown Is Best) Sliced
1 cup Cream
1 cup Grated Parmesan Cheese
2 sprigs Fresh Basil, Torn
Salt And Pepper
Preparation Instructions
In a medium pan, saute the chopped onion and garlic until soft, about 5 minutes. Once the onion and garlic are soft, place them in the bottom of a 9×13 inch pan. Top with the sliced zucchini, then the yellow crookneck squash, potatoes, and finally the tomato slices. Sprinkle generously with salt and pepper. Place uncovered in a preheated 450 F oven for 25-35 minutes. Test with a fork to make sure the potato slices are tender.

Take the casserole out of the oven and drizzle the cream on top of the veggies. Sprinkle the Parmesan cheese and fresh basil over the top and return to the oven for 15 more minutes. When done, the cream and cheese will bubble and melt. Let the casserole sit for a few minutes before serving. I serve this with any meat main dish, or my favorite is serving it for breakfast with a fried egg on top with toast. It is the best meal when your garden is bursting with fresh veggies.

Friday, October 9, 2009

Bacon Chocolate Chip Pancake Mix


By special request from Brian, I am posting this as his contribution to the recipe blog:
Mo's Bacon Chocolate Chip Pancake Mix

Like bacon with your pancakes? How about bacon in your pancakes? Mo's Bacon Chocolate Chip Pancake Mix ($14) offers exactly that, mixing tasty buttermilk pancake mix with Vosges Chocolates' delectable Mo Bacon Bar chips. Finally, a good reason to wake up early.
Go here to order yours now!

Baked Manicotti with Meat Sauce


Everyday Food is to Sara as Cook's Country is to me.

I LOVE this magazine, and I have been getting it from the charter issue.
In fact, I have been getting it for so long, that now I use all of Oct/Nov issues to plan all of my meals for October and November, and so on and so on...This allows me to try new recipes interspersed with old favorites that I forgot about.
Until I burn out, and then we have frozen pizza, and shhh...hamburger helper. I'm so ashamed right now.

But lately I have been on a roll! Every dinner we had this week was from the 2009 Oct/Nov issue, available in stores everywhere.
Last night, we had Baked Manicotti with Meat Sauce.
I even remembered that Cook's usually allows you to prep one step up to 24 hrs ahead, and made the sauce a whole one hour ahead. The sauce was gooood. Not so lean, but so good, Patrick wants to use this sauce on other pastas. Could be the highly addictive chemical additives found in pepperoni combined with the naptime inducing effects of pasta have created an unstoppable force.
My 12 year old assembled the cheese filling. I would recommend a softer, milder provolone. She complained a lot about the stinkiness of my provolone.

There are pictures of this, I will attempt to upload them, but I apologize for my technical inadequacies in advance.

Baked Manicotti with Meat Sauce
10/2009

You will need 16 no-boil lasagna noodles. The test kitchen’s preferred brand, Barilla, comes 16 to a box, but other brands contain only 12. It is important to let the dish cool for 15 minutes after baking.

serves 6 to 8
Meat Sauce

1 onion, chopped
6 ounces sliced deli pepperoni
1 pound 85 percent lean ground beef
1 tablespoon tomato paste
5 garlic cloves , minced
1/4 teaspoon red pepper flakes
2 (28-ounce) cans crushed tomatoes
Salt and pepper

Manicotti

3 cups ricotta cheese
2 1/2 cups shredded mozzarella cheese
1 1/2 cups shredded provolone cheese
1 large egg , lightly beaten
1/2 teaspoon salt
1/2 teaspoon pepper
1/4 cup finely chopped fresh basil
16 no-boil lasagna noodles (see note)

1. GRIND MEAT Adjust oven rack to upper-middle position and heat oven to 375 degrees. Pulse onion and pepperoni in food processor until coarsely ground. Add beef and pulse until thoroughly combined.

2. MAKE SAUCE Transfer beef mixture to large saucepan and cook over medium heat, breaking up mixture with wooden spoon, until no longer pink, about 5 minutes. Using slotted spoon, transfer 1 cup beef mixture to paper towel-lined plate and reserve. Add tomato paste, garlic, and pepper flakes to pot with remaining meat mixture and cook until fragrant, about 1 minute. Stir in tomatoes and simmer until sauce is slightly thickened, about 20 minutes. Season with salt and pepper. (At this point, sauce can be refrigerated in airtight container for 3 days.)

3. PREPARE FILLING Combine ricotta, 2 cups mozzarella, 1 cup provolone, egg, salt, pepper, basil, and reserved meat mixture in large bowl. Pour 2 quarts boiling water into 13- by 9-inch baking dish. Soak noodles until pliable, about 5 minutes. Drain noodles on kitchen towel. Pour off water and dry baking dish.

4. ASSEMBLE DISH Spread half of meat sauce over bottom of baking dish. Following photos below, top each soaked noodle with ¼ cup cheese filling, roll, and arrange, seam-side down, over sauce in baking dish. Spread remaining sauce over manicotti. Cover with foil and bake until bubbling around edges, about 40 minutes. Remove foil and sprinkle with remaining mozzarella and provolone. Bake until cheese is melted, about 5 minutes. Let cool 15 minutes. Serve.

STEP BY STEP: Thinking Outside the Tube


1. Soak the no-boil lasagna noodles briefly in hot water. With the short side facing you, spread the filling across the bottom of each and roll into a tube.


2. Arrange the rolled manicotti, seam-side down, over the sauce in the baking dish.

Tuesday, October 6, 2009

Soup Week: Spinach, White Bean and Italian Sausage Soup


This is one of the tastiest soups ever. The recipe comes from my aunt Mary Dooley, who once told me that if you like to cook, you have to like to eat. So true. Kids love it, especially when you substitute some macaroni or little pasta for some of the beans!! I'm not a big bean person myself and can never bring myself to use 4 cans.

1 lb. Italian sausage
10 large garlic cloves
20 oz. spinach, (2 10 oz. bags)(or frozen)
4 cans white beans (cannelini or Great Northern)
3 cans chicken broth
2 plum tomatoes, diced
1/2 c. grated parmesan cheese
salt and pepper, to taste
red pepper flakes (pass at table if desired)

Brown sausage in bite size chunks, first removing casing if link-style. Drain on paper towel. Wash spinach well and dry; chop into 2 inch pieces. In a large soup pot, saute garlic in olive oil until softened. Add spinach and cover. Cook, stirring occasionally until wilted. Drain and rinse beans. Add to pot, along with chicken broth. Bring to gentle boil. (This is where I throw in some pasta and extra water). Cook 10-15 min. Add parmesan and sausage and heat through. Add tomatoes, salt and pepper and serve immediately. Serve with crusty bread and extra parmesan cheese! Serves 8

photo credit: eatshowandtell.com

online cooking group - week three: cider-glazed salmon

as i am currently reading this book by molly wizenberg, i thought i would give a few of her recipes a try.


sliced spring salad with avocado and feta (i realize its not spring, but i am ok with that)...


burg's potato salad...


cider glazed salmon...
ingredients:
- 1 T unsalted butter
- 1 medium shallot, peeled and halved lengthwise
- 2 cups fresh unfiltered apple cider
- 4 salmon fillets (i only used 2 since they seemed a little big and we had plenty of sides)
- salt
- 1/2 cup heavy cream (i used half and half)

Directions:
in a large, heavy skillet, combine the butter, shallot, and cider.  place over medium-high heat, and bring to a simmer.  simmer for 5 minutes, then remove and discard the shallot.
Place the fillets gently in the pan.  spoon a bit of the liquid over them, so that their tops begin to cook.  cover and simmer very gently.  the fillets will cook for 8 to 10 minutes per inch of thickness.  transfer the cooked salmon to a platter, and cover loosely with foil to keep warm.
to prepare glaze, raise the heat under the pan to medium-high, add a pinch of salt, and simmer, stirring frequently, until the liquid is reduced by about two-thirds.  it should be slightly thickened and should just cover the bottom of the pan.  reduce the heat to medium, and add the cream.  stir well to combine.  boil, stirring frequently, for a few minutes, until the mixture darkens to a pale golden caramel - like those brach's milk maid caramel candies, if that helps (i think this is extremely helpful) - and is reduced by one-third to one-half.
place salmon fillets on 4 plates and top each with a spoonful of sauce.  it should coat them like a thin, loose glaze.  serve immediately.

note: if you'd like to make this for only 2 people,  halve the amount of salmon, but not the sauce quantities.


all in all i would say this week was a half success.  i got my kids to eat fish, but not necessarily to be totally excited about it.  lucy was clearly downing hers with water as the entire bottom of her glass was full of salmon bits (too much detail here?).  i cannot say my kids would exactly cheer if i said i were making this again.  pete liked it, but definitely prefers the way we usually make it with onions, capers and lemon.  he did, however think this was an excellent kid option as the sauce takes away a bit from the overly fishy taste and is somewhat sweet due to the cider.  if your kids like salmon or are at least open to it, i definitely think this recipe is worth trying.  i liked it, at least...  as for the rest of the meal, pete, jack and i liked the potato salad, finn wouldn't touch it and lucy carefully picked out all the scallions and then enjoyed it.  and, as for the salad, i really liked it.  pete didn't care for the radichio, which apparently lucy didn't either because she said she liked the salad, "except for the purple stuff."  i think i might try this salad next time with just some mixed greens.  it might be more of a crowd pleaser that way...  oh, and the boys wouldn't try the salad, so no reviews there.  that pretty much does it.  my long rambling review of a mildly well received meal.  it could use some tweaking, but i am glad i tried it.  i think less picky kids would love it just the way it is.  would love to know how it goes for anyone else who tries it...

and for anyone interested in checking out the rest of the online cooking group, here is the site - raising foodies.

Tuesday, September 29, 2009

Still Soup Week: Tortilla Soup!


Ok, so I'm a little late for Soup Week, but we are actually having our first soup weather, and I made this last week so it should qualify! It's kind of a combo of a Burch family recipe (from Aunt Cathy via one of Darrell's newsletters I think) and a Williams-Sonoma recipe.

6 cloves garlic, minced
1 onion, chopped
2 small tomatoes, diced (or 1 can diced)
1 jalapeno, seeded, and finely choopped
2 Tblsp. olive oil
1 chicken breast
2 cans chicken broth
2 Tblsp. oregano
1 Tblsp. chili powder
1/2 tsp. cumin
1 cup water
FOR SERVING:
tortilla chips, sour cream, avocado, grated cheese, cilantro

Saute first four ingredients in olive oil until tender. Add remaining ingredients. Boil for 1 hour. Remove chicken from bone and cut up into bite-size pieces. To serve, put broke up tortilla chips on bottom of individual servings. Top with cilantro, grated cheese, sour cream and avocado.

I've also made this with leftover turkey or chicken bones... cover with water and boil for a while to get your own broth. Good way to eke another meal out of a roast chicken/turkey.

photo credit: williams-sonoma.com

online cooking group - week two: butternut squash soup

i used a combination of this recipe (from the barefoot contessa) and general tips from my sister-in-law christine to create this delicious butternut squash soup. my ingredients are going to be a little all over the place, so this might be a good recipe for someone who likes to wing it, not for someone who needs to follow exact directions (the ina garten recipe might be better for you). i will do my best though...

ingredients:
2 T olive oil
2 large onions
2 butternut squash
2 apples (i had gala on hand...)
1 T thyme (or seasoning of your choice)
salt and pepper, to taste
about 2-4 cups water (or chicken stock)
heavy cream or half and half (i didn't have either, so i just stirred in a little extra sour cream to each bowl when i served it to make it creamier)
optional: honey, spinach, bacon, sour cream, lemon
Directions
Warm the olive oil, onions and thyme in a large stockpot uncovered over low heat for 15 to 20 minutes, until the onions are tender. Stir occasionally, scraping the bottom of the pot.
Peel the squash, cut in half, and remove the seeds. Cut the squash into chunks. Peel, quarter, and core the apples. Cut into chunks. (next time i might try baking the squash and then scooping it out, as i found it a little hard to peel it... turned out fine, though, so either way).

Add the squash, apples, salt, pepper, and 2 cups of water to the pot. Bring to a boil, cover, and cook over low heat for 30 to 40 minutes, until the squash and apples are very soft. Process the soup through the bowl of a food processor fitted with a steel blade. Here I also threw in a few handfuls of spinach. (I find soup is an excellent way to get vegetables in my kids). Christine usually serves it with spinach on top, but i knew my kids wouldn't go for that, so i thought i would try this out.
Pour the soup back into the pot. Add enough chicken stock or water to make the soup the consistency you like; it should be slightly sweet and quite thick. Here i would have liked to add some half and half or heavy cream, but didn't have either. I did add a bit of honey and some lemon juice. then seasoned it with salt and lots of pepper (pete added even more pepper when it was served... it really is good if you make it peppery). then i served it with a little sour cream and bacon pieces on top.

my whole family loved it. we had a decent amount leftover, but who doesn't love something easy for lunch the next day? i made little chicken salad sandwiches to go with it, which my kids always love, thus i found it to be a relatively easy and all around pleasing meal. any time you don't have to convince your kids to take "a few more bites" i would say it is a success.


so, i am going to make this week "soup week" on pots and peter pans and encourage everyone to share a favorite soup recipe. you don't have to make it this week if you don't want to and don't feel like you can't share just because you don't have pictures. throw down the recipe and be done. that is all the inspiration the rest of us need.

Friday, September 25, 2009

Cranberry Carrot Scones


Since Emily took such a lovely photo, here is the recipe I used. It is from this very fun food blog: check out her bread pudding recipes...they look amazing! I substituted orange flavored dried cranberries for the golden raisins to fit in with our "C" themed day and wheat germ for the ground walnuts so I could give them to Kateri who hasn't tried nuts yet, but the ground walnut idea sounds delicious, as does the glaze, which I left out. I just brushed the tops with milk and sprinkled them with a little raw sugar instead. I apologize for the fact that I can never seem to follow a recipe in its entirety...I hope my posts aren't too confusing!

Tuesday, September 22, 2009

mmmm.....delicious


emily is out at "legally blonde"....the broadway version, and i am home with the kids (who are all now sleeping). i figured i would check if any new recipes had been posted, but sadly, it was still just "macaroni salad" (no offense sara, but i was hoping for "beer marinated prime rib").....which got me thinking, why don't i contribute. so, here it is.....

it is tough to get it right, so i have taken some pictures to provide some instructions (i realize my pictures aren't slanted or with a nice lens or on a rustic table, but i did my best......actually, i just took them and called them "my best" so i wouldn't have to figure out how to take nicer ones). in any event, here you go.

Step 1: get a Corona.....hopefully from the fridge unless you are my crazy CIA neighbor that doesn't wear a shirt and drinks natural light "lukewarm" all day long

corona_bottle_d1.jpg


Step 2: using your wedding ring, position your finger like so:


Step 3: grab hold of the bottle cap by wrapping your fingers over the top of the bottle.....like so.....


Step 4: push upwards with your knuckles while firmly gripping the bottle cap between your ring and your ring finger....don't be a pansy, it hurts a little, but if you do it 4-5 times per night, your fingers gets used to it....or it gets numb from too much alcohol, but either way, it feels fine.....like so....


Step 5: throw the bottle cap into a jar for your wife's arts and crafts project that you have no idea what she is using them for, yet you will probably think it is really creative and cool when she is done. and then enjoy a nice drink of ice cold beer. feel free to shave as well, i just didn't think it was necessary for this posting.......like so......


Step 6: go sit on the couch and think about how you should really finish the book you have been reading for the past 3 months......and then, after 15 seconds of thought, pick up the remote and turn on sportscenter.....nothing could possibly happen in sports on a tuesday night, but who knows, maybe there are some good highlights that you missed the last 3 times you watched sportscenter since last night.

Thursday, September 10, 2009

Macaroni Salad


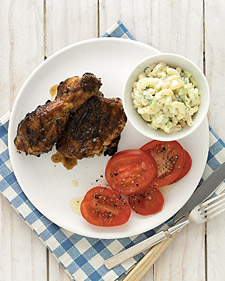
I know it's strange that all I ever post on here is pasta dishes, but I guess we eat a lot of pasta. At least the kids love it. This is a great summer one, and it goes so well with any grilled meat - chicken, steak, ribs, whatevah. Once again, credit to Everyday Food.


Ingredients
Serves 4

* 1 cup (4 ounces) elbow macaroni
* 1/4 cup light mayonnaise
* 1/4 cup reduced-fat sour cream
* 1/2 cucumber, peeled, seeded, and finely chopped
* 1 celery stalk, finely chopped
* 1/4 cup chopped fresh dill
* 2 tablespoons fresh lemon juice (from 1 lemon)
* Coarse salt and ground pepper

Directions

1. In a large pot of boiling salted water, cook elbow macaroni according to package instructions. Meanwhile, in a medium bowl, combine mayonnaise, sour cream, cucumber, celery, dill, and lemon juice. Drain pasta, and rinse with cold water; add to bowl with mayonnaise mixture. Season with salt and pepper; toss to combine. Serve, or refrigerate, covered, up to 1 day.

Friday, August 28, 2009

Enchiladas with Pumpkin Sauce


I've made these enchiladas a million times and everyone seems to love them. I usually saute' some zucchini and top with Mexican cheese, and make a salad to go with it. I thought this was a good one with Fall almost here!!! Yay!


Serves 4-6
1 rotisserie chicken, skin removed, meat shredded
6 scallions, thinly sliced
Coarse salt and ground pepper
1 can (15 ounces) pumpkin puree
4 cloves garlic, peeled
1 jalapeno chile, quartered (remove ribs and seeds for less heat, if desired)
1 teaspoon chili powder
corn tortillas (6-inch)
1 1/2 cups grated sharp white cheddar cheese (6 ounces)
handful of roasted pepitas (totally optional, but good addition!)
Directions
1. Preheat oven to 425 degrees. In a medium bowl, combine chicken and scallions. Season generously with salt and pepper; set aside.
2. In a blender, puree pumpkin, garlic, jalapeno, chili powder, 2 1/2 cups water, 2 teaspoons salt, and 1/4 teaspoon pepper until smooth (hold top firmly as blender will be quite full). Pour 1 cup of sauce in the bottom of an 8-inch square (or other shallow 2-quart) baking dish.
3. Lay tortillas on work surface; mound chicken mixture on half of each tortilla, dividing evenly. Roll up tortillas; place, seam side down, in baking dish. (hint: If your tortillas are cold or a little dry, just heat them up in the microwave and they will be soft and pliable.)
4. Pour remaining sauce on top; sprinkle with cheese. If using pepitas, sprinkle on top. Place dish on a baking sheet; bake until cheese is golden and sauce is bubbling, 25 to 30 minutes. Let cool 5 minutes before serving.

Thursday, August 20, 2009

Parmesan-Stuffed Chicken Breasts


We had this for dinner last night - another great recipe from Everyday Food. It's really easy and good. I served it with rice and gravy(made from the pan drippings) and a green salad (the picture is not mine!). If it's still too hot to use the oven, you can do these on the grill, cooked indirectly.

Ingredients

Serves 4
1 cup fresh flat-leaf parsley leaves, chopped
1/4 cup plain dried breadcrumbs
1/4 cup grated Parmesan cheese
Grated (about 1 tablespoon) zest of 1 lemon
Coarse salt and ground pepper
4 (about 3 pounds) bone-in chicken breast halves
Directions

Preheat oven to 450 degrees. In a small bowl, combine parsley, breadcrumbs, Parmesan, and zest. Season with 1/4 teaspoon each salt and pepper.
Divide parsley mixture evenly into four mounds. Carefully loosen chicken skin with fingers; tuck parsley mixture under skin. Season with salt and pepper. Place in a 9-by-13-inch roasting pan.
Bake until skin is crispy, chicken is cooked through, and an instant-read thermometer inserted in the thickest part of the meat (avoiding bone) registers 165 degrees, about 30 minutes.

Thursday, August 13, 2009

who doesn't love breakfast for dinner?


if you are looking for something fun to do this weekend and live in the greater phoenix area, here is a suggestion... friday night (august 14th) several breakfast restaurants in the valley are participating in a "pjs and eggs" breakfast for dinner event. they will be open friday night starting at five to celebrate hickman's family farms' 65th anniversary. they ask that you show up in your jammies and bring a new pair (any size) of pajamas to donate to arizona's children association foster care program. matt's big breakfast, over easy and scramble are all participating (to name a few). for the complete list and details go here.

if you don't live in phoenix or simply don't feel like facing the crowds you could always steal some inspiration and make your own family breakfast for dinner friday night. pjs and all...


Tuesday, August 11, 2009


Chicken Tikka Masala
We love Indian food and this recipe comes REALLY close to how good it is in our favorite restaurant. I always make it with Jasmine rice and serve it with Naan- Indian flatbread that I can find in my local grocery store in the bread section. Brush it with olive oil and grill it or heat it up on a skillet.
For the Chicken:
1/2 teaspoon ground cumin
1/2 teaspoon ground coriander
1/4 teaspoon cayenne pepper
1 teaspoon table salt
2 pounds boneless, skinless chicken breasts , trimmed of fat
1 cup plain whole-milk yogurt or at fat free plain greek yogurt
2 tablespoons vegetable oil
2 medium garlic cloves , minced
1 tablespoon grated fresh ginger
Masala Sauce
2-3 tablespoons vegetable oil
1 medium onion , diced fine
2 medium garlic cloves , minced
2 teaspoons grated fresh ginger
1 fresh serrano or jalepeno chile , ribs and seeds removed, flesh minced
1 tablespoon tomato paste
1 tablespoon plus 1 teaspoon garam masala
1 (28-ounce) can crushed tomatoes
2 teaspoons sugar
1/2 teaspoon table salt
2/3 cup heavy cream
1/4 cup chopped fresh cilantro leaves
For the chicken :
Combine cumin, coriander, cayenne, and salt in small bowl. Sprinkle both sides of chicken with spice mixture, pressing gently so mixture adheres. Place chicken on plate, cover with plastic wrap, and refrigerate for 30 to 60 minutes.In large bowl, whisk together yogurt, oil, garlic, and ginger; set aside.
For the sauce:
Heat oil in large Dutch oven over medium heat until shimmering. Add onion and cook, stirring frequently, until light golden, 8 to 10 minutes. Add garlic, ginger, chile, tomato paste, and garam masala; cook, stirring frequently, until fragrant, about 3 minutes. Add crushed tomatoes, sugar, and salt; bring to boil. Reduce heat to medium-low, cover, and simmer for 15 minutes, stirring occasionally. Stir in cream and return to simmer. Remove pan from heat and cover to keep warm.
While sauce simmers, adjust oven rack to upper-middle position (about 6 inches from heating element) and heat broiler. Dip chicken in yogurt mixture (thickly covered) and arrange on wire rack set in foil-lined rimmed baking sheet or broiler pan. Discard excess yogurt mixture. Broil chicken until thickest parts register 160 degrees on instant-read thermometer and exterior is lightly charred in spots, 10 to 18 minutes, flipping chicken halfway through cooking. Let chicken rest 5 minutes, then cut into 1-inch chunks and stir into warm sauce (do not simmer chicken in sauce). Stir in cilantro if using, adjust seasoning with salt, and serve. Serves 4 to 6.